In this exercise we’re going to draw an apple using as many different features of CorelDRAW as we can. That will give you an idea of how the various options interact with each other.
Remember: As you follow my instructions below, there’ll be a few times when you’ll have to use the Freehand tool and the Shape tool to mold and form your apple, so your results might be a little different from mine. Don’t worry about that. Do the best you can. As we add fills, transparencies, and shadows, the best results are always subjective, so use my recommendations as your starting point, and then take it from there.
Let’s begin with a red ellipse. This will be the basis for the apple shape.

Start with a red ellipse
1. Start with a new drawing page, with a portrait orientation and points as the unit.
2. Open the Object Manager by selecting Window > Dockers > Object Manager, and then rename Layer 1 Apple.
3. Now open the Ellipse tool from the toolbox, or press F7. Draw a large circle, and then click the red swatch. Finally, right-click the mouse, and then select Convert To Curves from the menu.
Now we’re ready to shape the circle to look like an apple.
1. Begin by opening the Shape tool. Click the node that’s on top of the circle. Next, select the Cusp node button, which is located on the property bar. Now move the control handles attached to the top node upward.
2. Next, select the node located on the bottom of the circle, and then click the Cusp node button again. Now move the control handles attached to the node downward.
Move the top nodes up and the bottom nodes down (click the video)
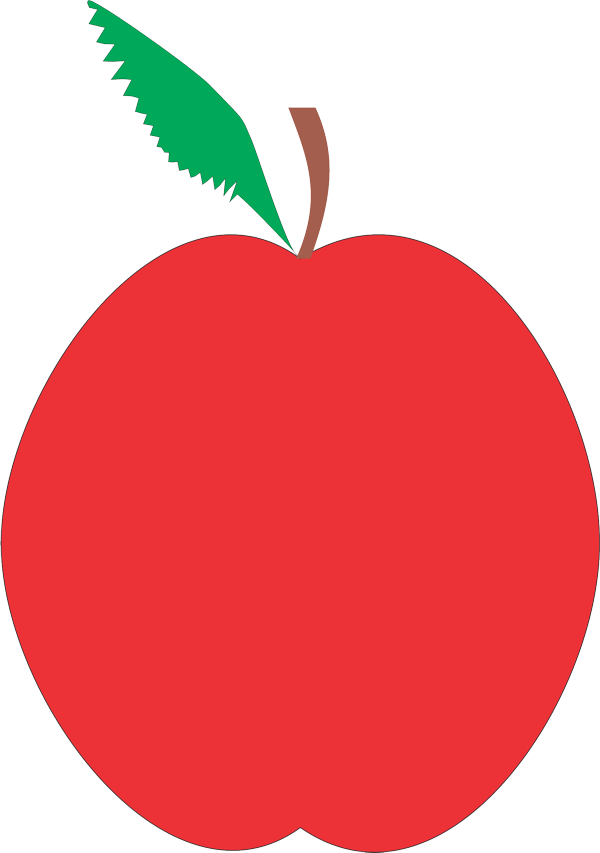
Excellent work! Your circle should now look like an apple. Next, we’ll create a topper for our apple by drawing a triangle and shaping it to look like a stem.
1. Create a new layer, and name it Stem.
2. Open the Polygon tool from the toolbox or by pressing Y. On the property bar, in the Points or Sides field, input 3. Then draw an upside-down triangle just above the apple. On the color palette, find and select a brown color swatch.
3. Convert the triangle to a curve; then open the Shape tool. Click the Select all nodes button, and then click the Elastic mode button.
4. Using the Shape tool, select nodes along the triangle, and shape the triangle to look like a stem.
5. You can add extra nodes if you need to by double-clicking any line from the triangle, or you can remove nodes by using the Shape tool to select the node and then pressing DELETE. When you’re satisfied with how your stem looks, use the Pick tool to resize it if necessary, and then move it to the top of the apple.

Shape a triangle into a stem
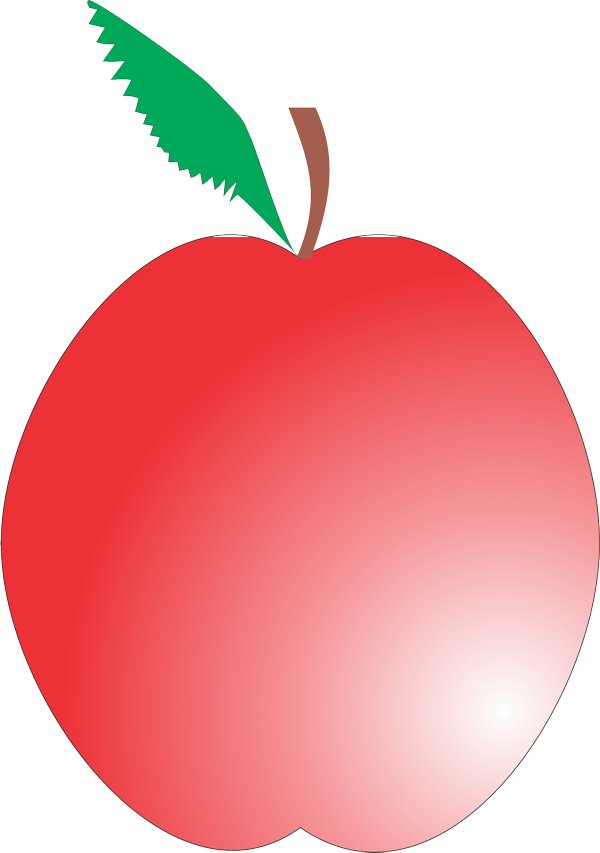
Nice work! Now we’re ready to add a leaf, which we’ll create with the Freehand and the Shape tools.
1. Create a new layer, and name it Leaf. Select the Freehand tool. Draw a basic leaf shape, similar to an upside-down teardrop. Don’t worry about accuracy or drawing the perfect shape, because we’re going to fine-tune the leaf with the Shape tool.
2. Next, convert your leaf to a curve, and then open the Shape tool. Begin shaping the leaf by selecting nodes and adjusting the control handles. When you’re satisfied with how the leaf looks, use the Pick tool to resize it if necessary, and then move it to the top of the apple, next to the stem.
3. Click the green color swatch.

Create a leaf with the Freehand and Shape tools
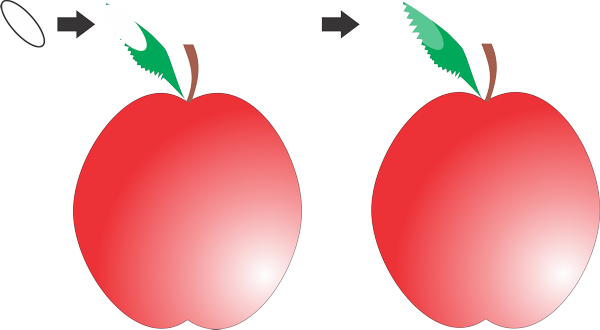
That turned out nice! Now we’ll give our leaf a little more detail using the Roughen Brush.
1. Open the Roughen Brush tool. Set the property bar functions to the following values: Size: 15, Frequency of Spikes: 1, Dryout: 5, Tilt: 40.
2. Use a click-and-drag action to apply the Roughen Brush to the left side of the leaf. I recommend you apply the brush to small sections of the apple at a time. Remember, it may take a couple tries before you get it right, so select Edit > Undo if you need to, and then try again.
Leaf with Roughen Brush applied
You did it, and it looks great! You should now have an apple sitting in front of you, ready for highlights and effects. Let’s start by adding a shine to the base using a fountain fill.
1. Select the apple, and open the Interactive Fill tool. From the Fill type menu, select Radial.
2. Next, choose the white Color marker, and move it to the lower, right-hand corner of the apple. Adjust the markers so that the glare or shine reflects on about the bottom third of the apple.
Apple with Radial fountain fill
We’re almost there! Our next steps will add depth to the apple by placing a transparency over the leaf.
1. Open the Ellipse tool, and then draw a long, oval ellipse and place it over the top portion of the leaf.
2. Click the white color swatch, and then remove the outline by opening the Outline Pen from the toolbox and selecting No Outline.
3. Now open the Interactive Transparency tool from the toolbox, and from the Transparency Type menu select Uniform. Next, move the Transparency Mid-point slider to 65.
Leaf with transparency
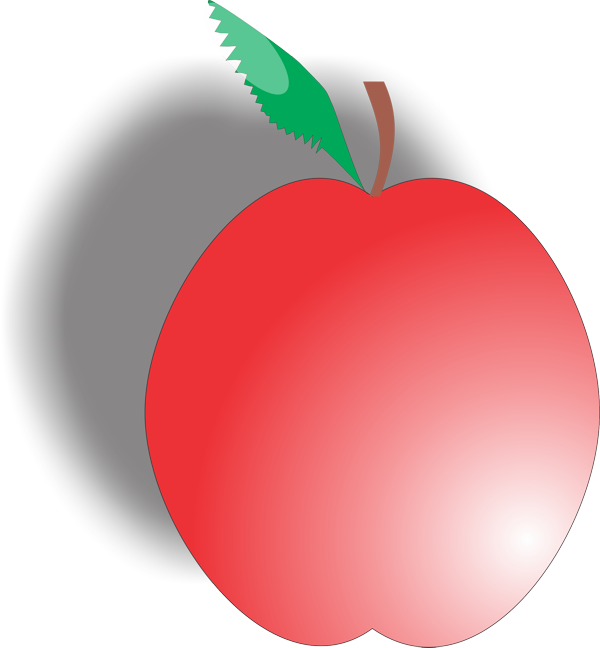
One more effect to go. Let’s add a shadow to the apple.
1. Select the apple, and then open the Drop Shadow tool.
2. Click the center of the apple, and then drag your cursor to the left and slightly up.
3. Next, move the Drop shadow opacity slider to 60. Then move the Shadow feathering slider to 13.
4. When you’ve finished, make sure to save your apple.

Completed apple with shadow
That looks really good! You did an excellent job!
